

Flower Child Jeans DIY

That's the clothing swap on the deck behind me! I'm wearing basically no clothes because I hadn't yet picked through the tables of fabulous used clothing. (Just kidding, it's because I was about to take nude photos for the Modern Muses Oracle! Photo by Jennifer Cote.)


I love clothing swaps.
I didn’t know this until Ella suggested we have one at the Citrine Palace as part of her birthday celebration this Summer Solstice. What a great idea!
We set up tents, tables, and blankets out on the deck, and I was the first to lay out my pile of the clothes I was ready to part with (Ella and others soon followed suit). As guests arrived, they added their clothes to the growing collection for everyone to peruse.
I think this is such a great idea for a party, because everyone wins! Everyone who participates gets to clean out their closet and let go of things that no longer bring them joy; everyone gets new-to-them clothes for absolutely free; everyone gets to see some of their old favorites start new lives with their friends; and all the leftovers get donated at the end. So basically, I got to tidy my home, freshen up my wardrobe, see my friends happily wearing clothes I no longer wanted, AND donate to charity all in one fell swoop.
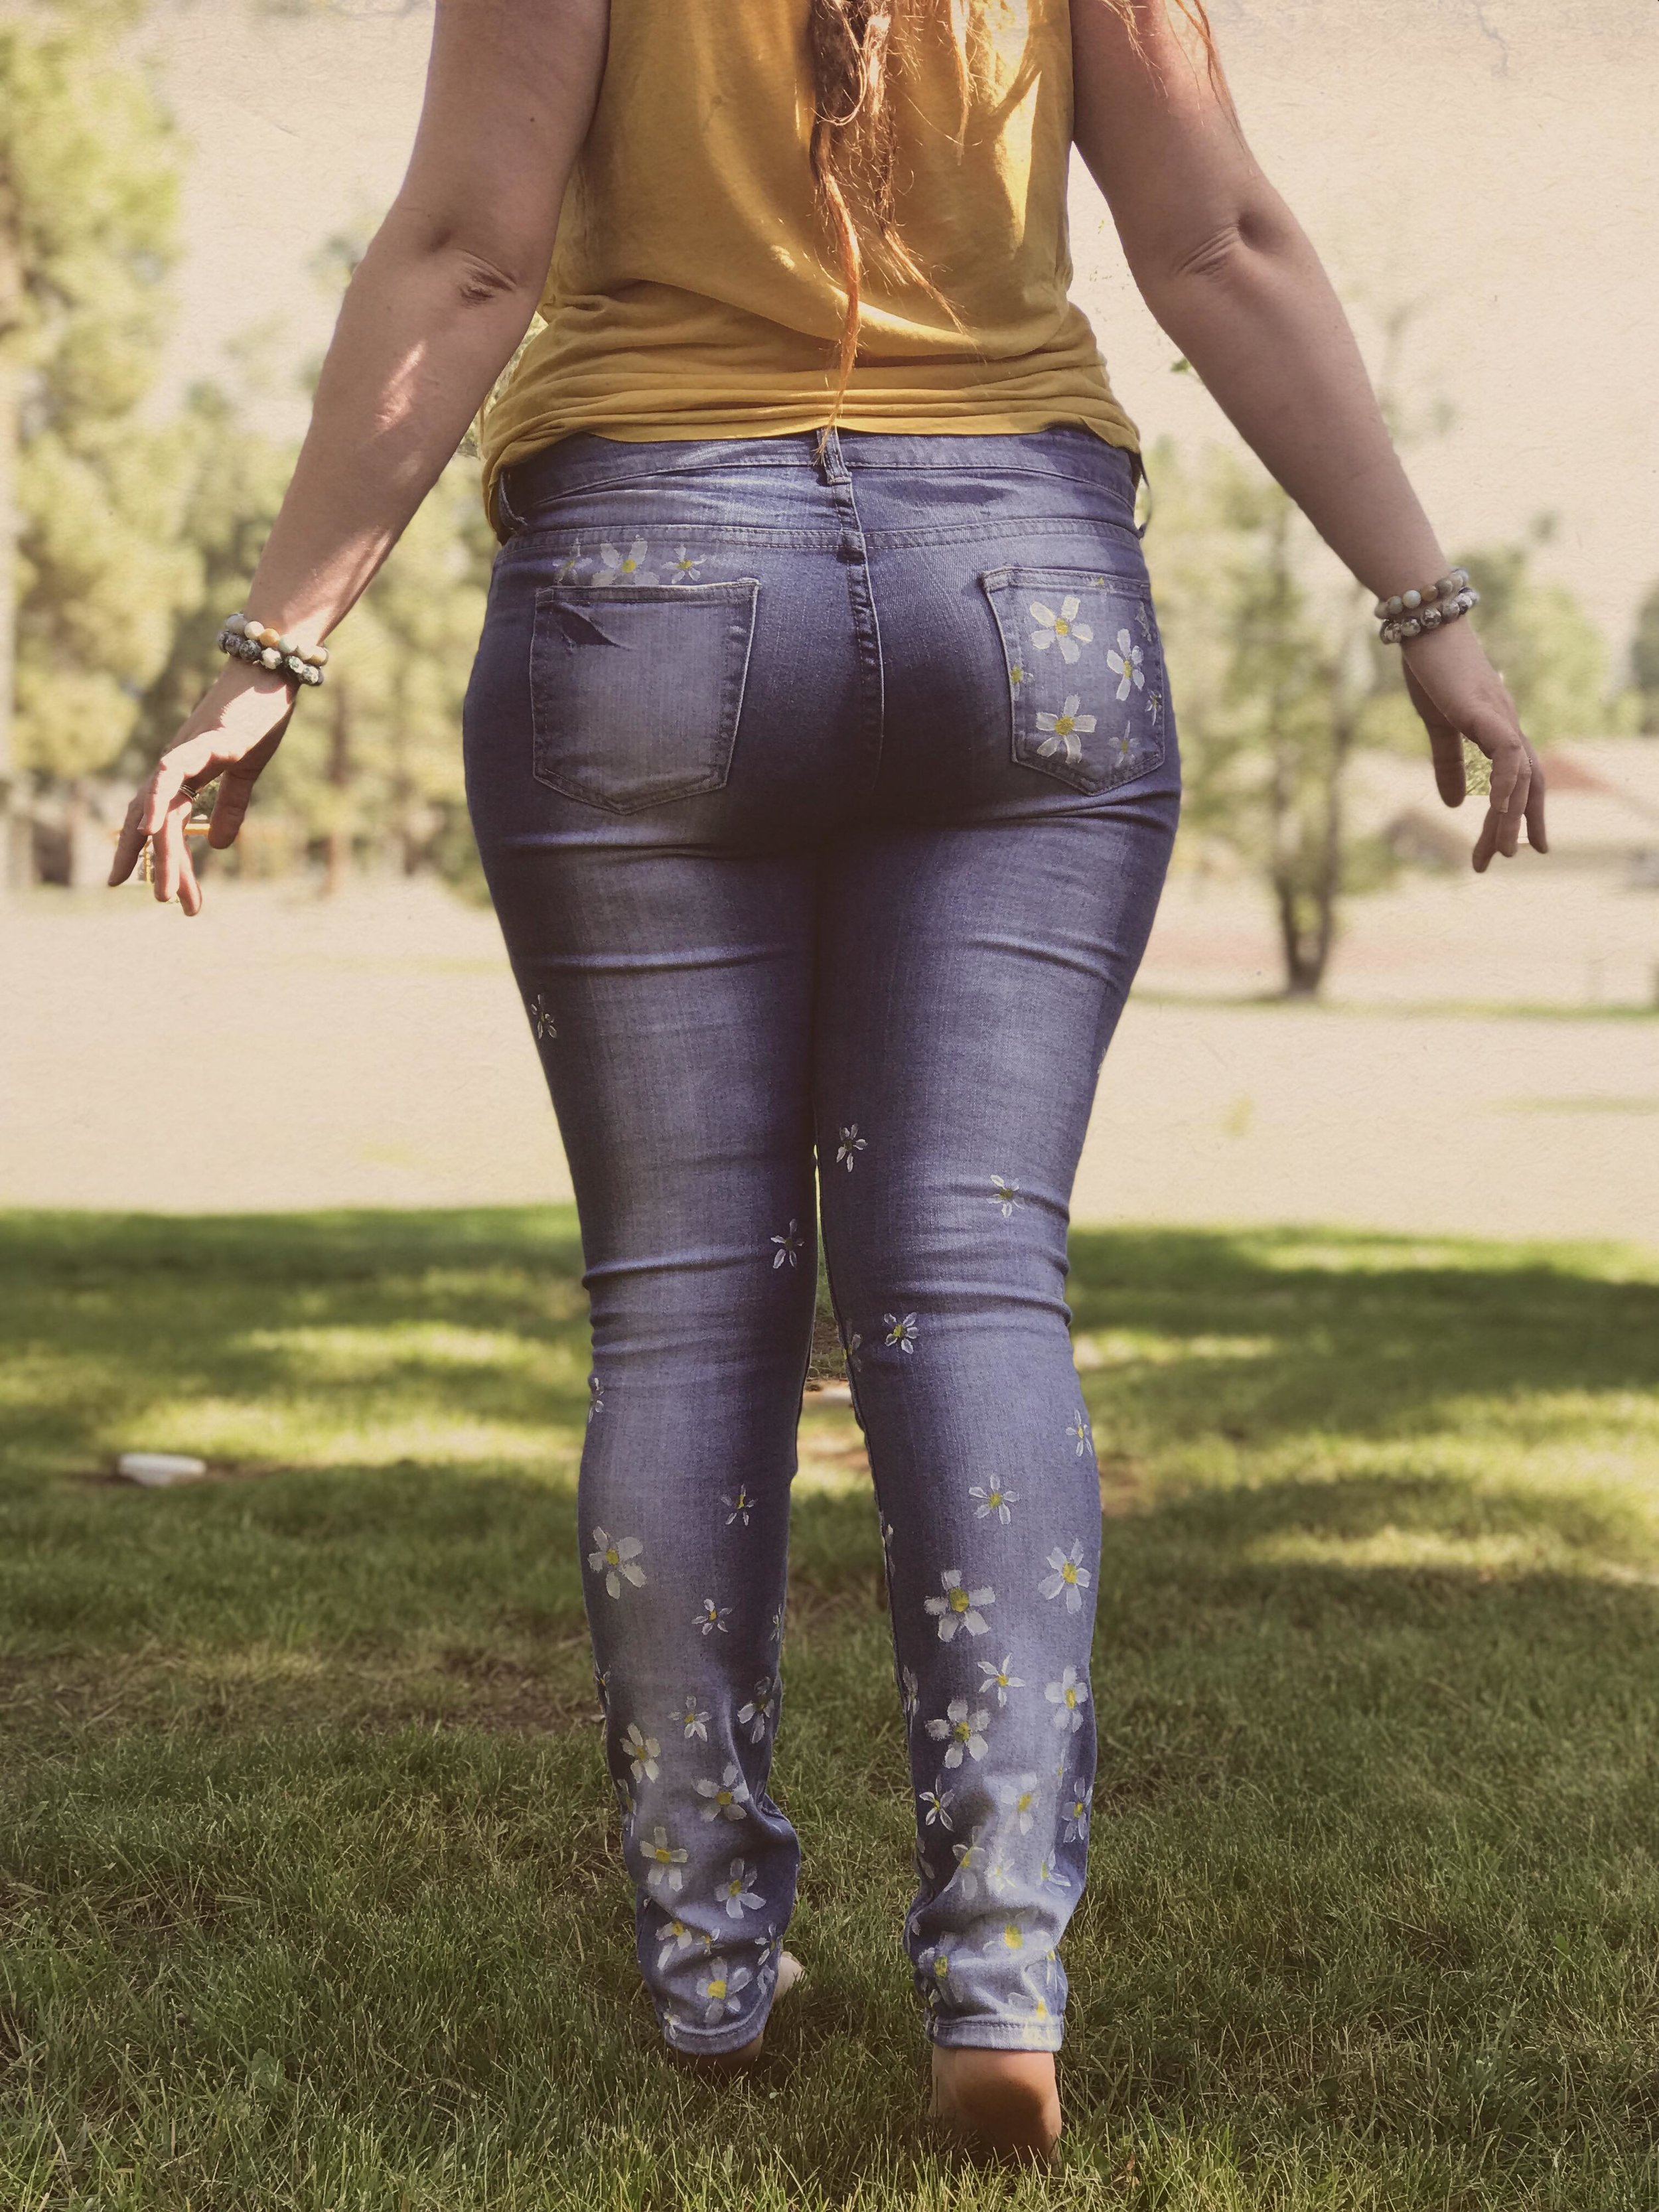
It was really fun to pick through the items my friends were letting go of! I ended up with a bunch of new pieces to play with, including a perfectly-fitting pair of jeans which I immediately envisioned as the base for a DIY project that had been floating around in my head for a while... Daisy Jeans!

These were seriously SO easy, and quick enough that I did the whole DIY on my bedroom floor on my last day home in Austin while I was supposed to be packing for a road trip to Colorado. (I did eventually finish packing, and you bet your bellbottoms I packed these jeans!)
All you need is:
- white fabric paint (pretty much the whole bottle)
- yellow fabric paint (hardly any)
- one smallish paintbrush (I used a flat square-ish one but I think a more rounded one would have been a little better)
- the jeans (these were VIP brand secondhand)
- palette (I just used a little bowl and washed it out right away when I was done)
Time Required
About an hour? Maybe a little more if you include drying time on the back.
I think it took about fifteen to twenty minutes per side to paint the daisies, plus drying time for each side. Like I said, I was supposed to be packing so I had plenty to do to occupy myself while the front dried before I could paint the back.
The Painting Process
I started with the white petals so the yellow centers would sit on top. The yellow centers really bring the flowers together and give them identity, so don’t worry too much if your flower shapes aren’t perfect. I painted some weird-looking ones but you can hardly tell on the finished jeans.
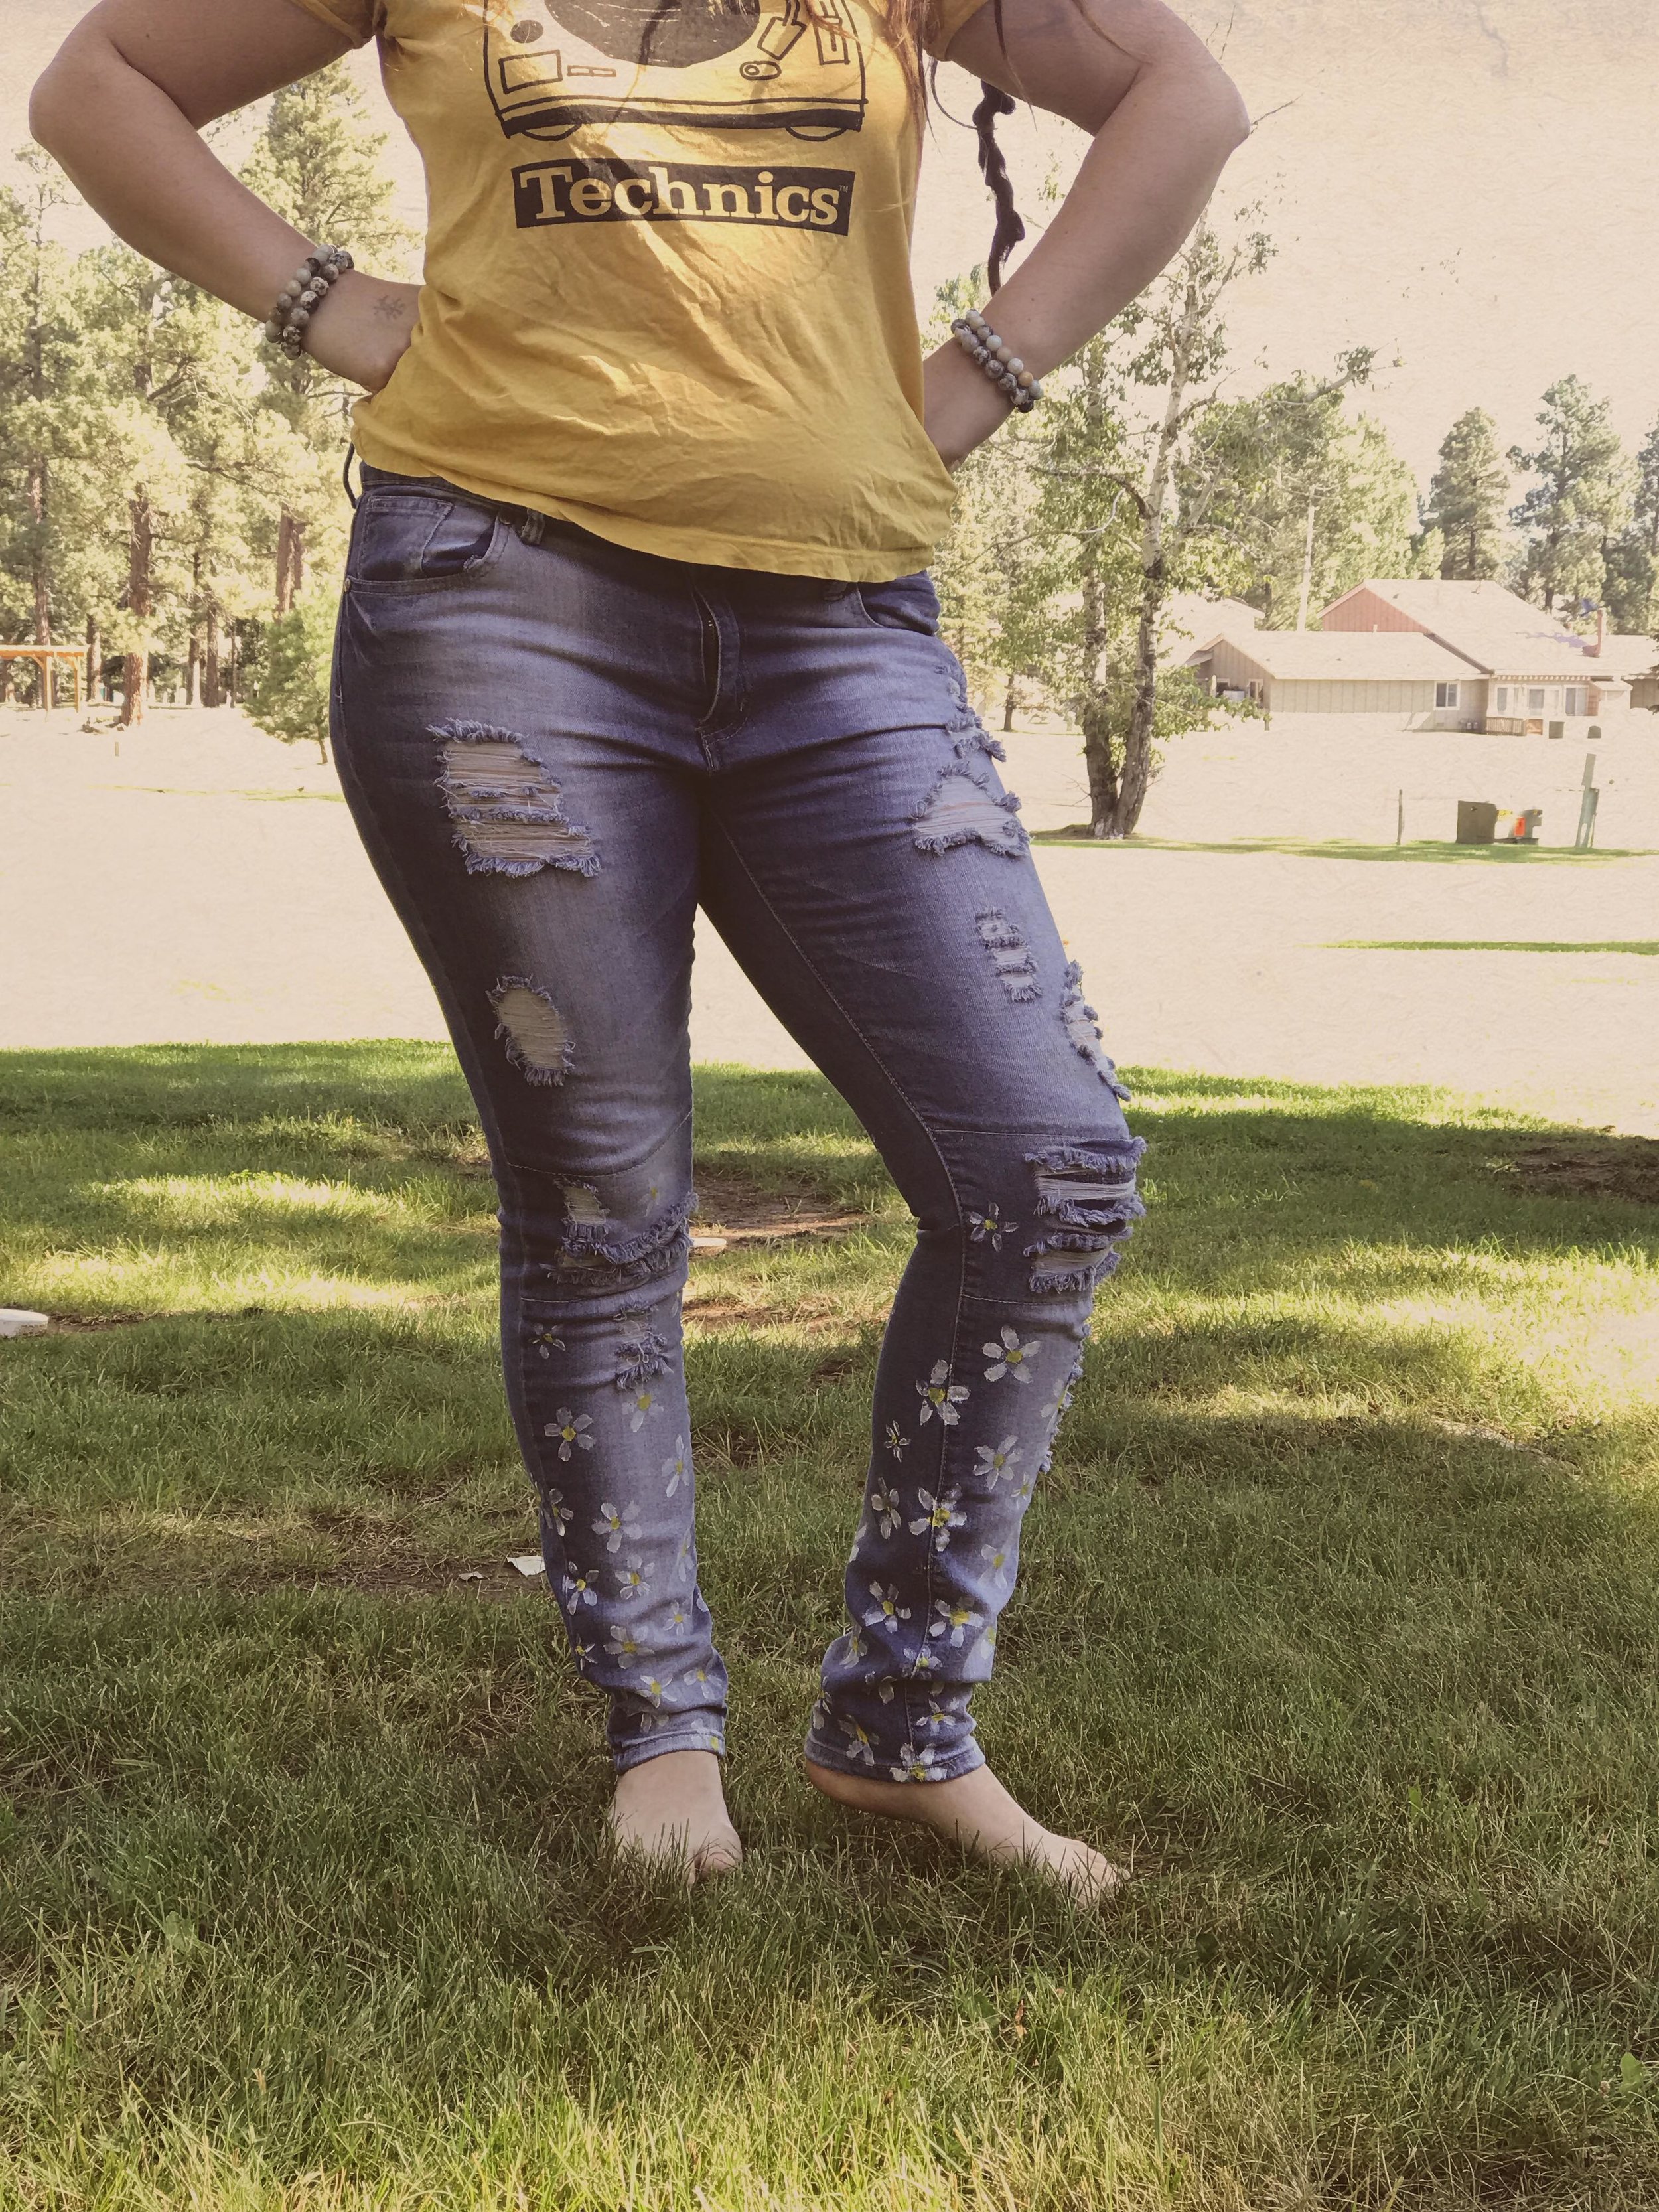
My preferred method for painting daisies is five petals with brush strokes toward the center of the flower. By starting on the outside edge of each petal you can have a little more control over the final shape and size of the flower, and as you lift the brush the petals will thin out and taper towards the center. I did add a little bit of water (just a drop or two) to the white paint to make it go on more smoothly. The trade off was that because denim is so absorbent, much of the paint soaked right in and wherever I had thinned out the paint I had to do two or three layers of petals for them to show up clearly once they dried. Fortunately they dried so fast that it was easy to tell where I needed to go back and add second and third coats as I went, and I did not have to do any touch ups later. Without thinning the paint, I had to practically drag it across the surface of the denim and re-dip my brush every one or two petals... so while I could have done it in one coat that way, I think I saved time and frustration in the long run by adding a few drops of water.
I painted the biggest daisies quite close together near the ankles, and thinned out the placement of smaller flowers up toward the knee. I allowed myself to add a few small flowers up top but tried not to get carried away
I wanted a few flowers on the sides so there wouldn’t be so much of a clear front/back separation in the pattern. So, I painted a few half flowers on the front edges to finish when I got to the back.
I did NOT thin the yellow paint, as I didn’t need smooth brush application for the daisy centers and I kind of wanted a little bit of 3-D texture. Not too thick, though! When fabric paint is applied too thickly it’s more liable to peel off over time. (I learned this the hard way despite my mom’s best attempts to warn little 3-year old me.)
When the front was finished, I found productive distractions (i.e. packing) to occupy myself for the duration of the drying time. Once the front was dry (20-30min), I flipped the jeans and repeated the process on the back, starting with the unfinished half-flowers I began on the front earlier.
I will say the internet seems to think that fabric paint takes 1-3 hours to dry. It DOES depend on how thick your application is and what brand you use, but I packed my jeans in my suitcase about 2 hours after painting the FRONT, nevermind the back. Use your own best judgment.
I chose to paint daisies all over one of the back pockets, and a few as if they were bursting out of the other back pocket. I like this effect, but you can play with different ideas, paint both pockets the same, mix and match, or leave the pockets plain.
Once the paint is dry, they’re ready to wear! Strut your newly-refurbished denim and rock on, flower child!
This post contains affiliate links.

